Muvipro Menu Settings
Video Tutorial
Create a Menu
- Open Appearance > Menus > create a new menu.
- Name it, then click Create Menu.
- Add items from Pages/Posts/Custom Links/Categories, then click Add to Menu.
- Arrange the order; create dropdowns using drag & drop.
Menu Locations
- Primary: main header menu.
- Secondary: secondary menu below/above the primary.
- Top Navigation: navigation above the header.
Configure in Appearance > Menus > Manage Locations, assign a menu to each location, then Save Changes.
Additional Menu Item Options
Note: Simple mega menu (column menu) is supported. Configuration steps:
- First enable CSS Classes: click Screen Options at the top right to reveal the settings; see the screenshot below:

- Check the CSS Classes option. Then edit the Parent Menu (main menu; see the video above).
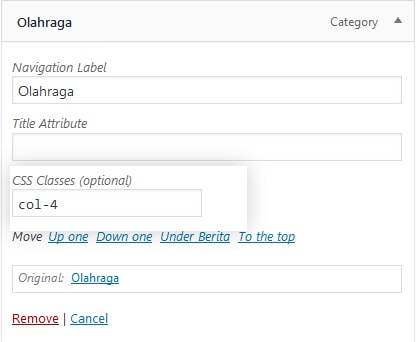
- In CSS Classes, enter:
- col-2 for a 2-column submenu
- col-3 for a 3-column submenu
- col-4 for a 4-column submenu
- Done.
Note: The Muvipro theme supports up to 3 menu locations; see the tutorial video above.
Top Navigation (If Supported)
In certain versions (e.g., v1.0.4+), Muvipro adds Top Navigation:
- Used for quick links (e.g., important pages, primary categories).
- Full configuration is in the documentation: Top Navigation Muvipro
Additional Tips
- How to add icons to the menu: Add Icons to Menu