Newkarma Installation and Setup
Video Tutorial
Before installing Newkarma, watch the video above to the end.
Installation Steps
- Download the theme file from the member area.
- Extract the package you downloaded, then upload newkarma.zip via Appearance > Themes > Upload Theme.
- Activate the Newkarma theme.
- Install and activate the recommended/required plugins.
After all required plugins are installed and active, proceed to license activation and demo import.
License Activation
- Go to Plugins → Newkarma License.
- Enter the license key you received from the member area:
- Log in to https://member.kentooz.com
- Open the License menu:
https://member.kentooz.com/softsale/license
- Copy the license key for the Newkarma theme, then paste it on the Newkarma License page.
- Save, and ensure the license status is active so updates and support work properly.
Import Demo
- Go to Appearance > Import Demo Data.
- Click Import Demo Data, install required plugins, and wait until complete.
- The layout will follow the demo; then adjust menus, widgets, and customizer settings.
Newkarma Core Plugin Settings
The Newkarma theme uses the Newkarma Core plugin to manage core features. Settings screenshot:
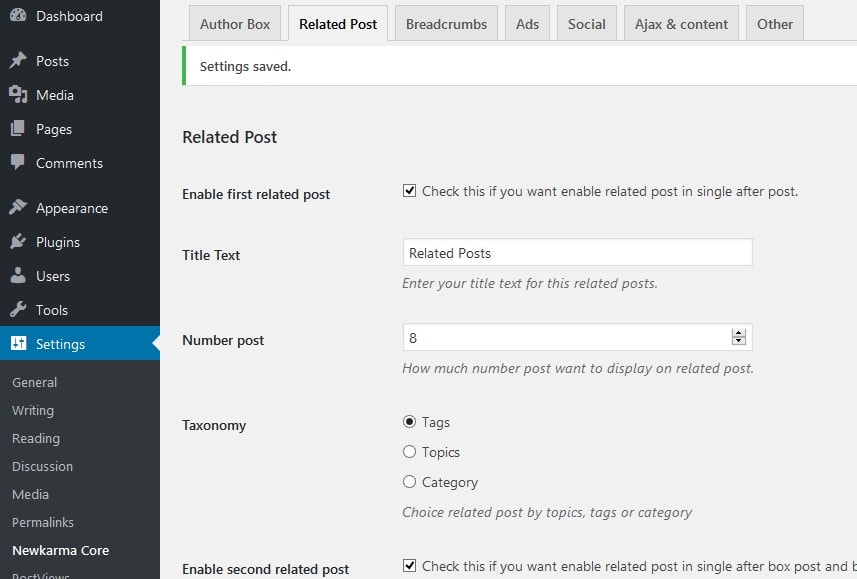
Go to Settings → Newkarma Core. Key tabs:
Author Box Tab
- Enable/disable the author box on single posts.
- Configure author box text and appearance.
Related Posts Tab
- Enable the related posts feature.
- Set the number of related posts displayed.
- Configure related post basis (category, tag, etc., if available).
Breadcrumbs Tab
- Enable breadcrumbs.
- Configure breadcrumb text and separator.
Ads Tab
- Configure ad code in various locations:
- Above/below content.
- Sidebar.
- Other locations provided by the theme.
- Provide an anti‑adblock script option if needed.
Social Tab
- Configure social share buttons.
- Configure OpenGraph if you’re not using an SEO plugin for OG.
Ajax & Content Tab
- Configure infinite scroll navigation (if supported).
- Configure how content is loaded via Ajax.
Other Tab
- Specify scripts to output in:
- Head
- Footer
- Can be used for:
- Google Analytics
- Facebook Pixel
- Other optimization scripts (e.g., disable emoji, query string version, etc.).
Appearance Settings via Customizer
All primary display settings are managed through Appearance → Customize. Settings screenshot:
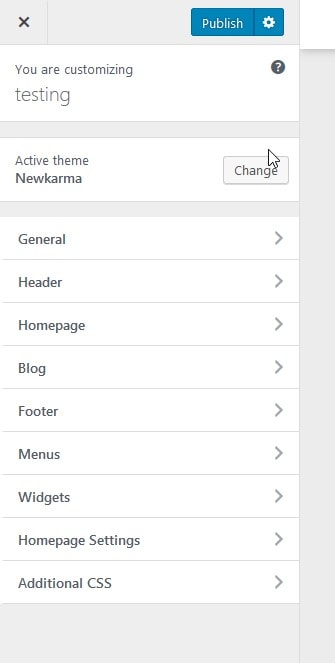
General Tab
- General theme settings:
- Global layout (boxed / fullwidth).
- Primary color, background.
- Background image.
- Font settings:
- Choose Google Fonts.
- Set heading and body font sizes.
- Set text colors.
Header Tab
- Header area settings:
- Site icon and logo.
- Header background color.
- Header background image (if used).
- Main menu settings:
- Menu layout.
- Menu colors (normal, hover, active).
Homepage Tab
- Configure Headline Carousel.
- Configure homepage modules (content blocks on the homepage).
Blog Tab
- Blog layout settings:
- Sticky sidebar.
- Site navigation.
- Blog content.
Footer Tab
- Footer settings:
- Footer background color.
- Copyright text.
- Number of footer widgets.
Menus Tab
- Configure navigation menus (shortcut to Appearance → Menus).
Widgets Tab
- Configure sidebar and module widgets:
- Widgets in the main sidebar.
- Widgets in the footer.
Additional CSS Tab
- Add custom CSS for advanced customization.
Server Requirements
Recommended server setup for running Newkarma:
- Apache with PHP 7.2+.
- WordPress 5+ (latest version recommended).
- Curl and OpenSSL modules enabled (required).
If you still use PHP below 7.2, upgrading is strongly recommended for security and compatibility.