
How to Configure Menus in the Wpberita Theme
The Wpberita theme uses WordPress’s native menu system.
Setup is similar to other Idtheme themes.
Video Tutorial
The original documentation provides a video. Watch it first to understand the setup flow.
Create the Main Menu
- Go to Appearance -> Menus.
- If you don’t have a menu yet:
- Click create a new menu.
- Name it (e.g., Main Menu).
- Click Create Menu.
- Add items to the menu:
- From the left panel (Pages, Posts, Custom Links, Categories).
- Check the items you want to include.
- Click Add to Menu.
- Arrange the menu structure using drag & drop.
- To create a submenu (dropdown), move an item slightly to the right under its parent.
Menu Locations
- Primary: (Supports 3 levels) main header menu.
- Secondary: (Supports 3 levels) menu after the main header menu.
- Side menu: (Supports 2 levels) mobile menu.
- Scroll Mobile Menu: (Supports 1 level) scrollable navigation on mobile.
- Footer menu: (Supports 1 level) footer navigation.
Configure in Appearance > Menus > Manage Locations, assign a menu to each location, then Save Changes.
Additional Menu Item Options
Note: Simple mega menu (column menu) is supported. Configuration steps:
- First enable CSS Classes: click Screen Options at the top right to reveal the settings; see the screenshot below:

- Check the CSS Classes option. Then edit the Parent Menu (main menu; see the video above).
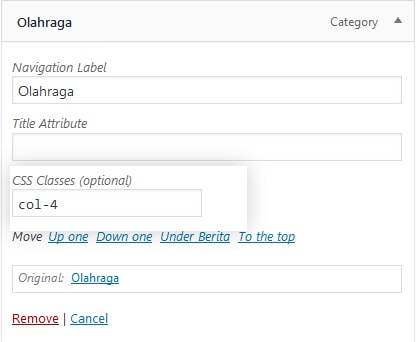
- In CSS Classes, enter:
- col-2 for a 2‑column submenu
- col-3 for a 3‑column submenu
- col-4 for a 4‑column submenu
or:
for color, new, and dot class codes, enter:
- menu-dot to add a dot above the menu
- menu-new to add a “new” label to the menu
- menu-orange to color the menu orange
- menu-green to color the menu green
- menu-blue to color the menu blue
- menu-red to color the menu red
In version 2.0.0+ there are 4 new menu colors:
- menu-orange-light to color the menu light orange
- menu-green-light to color the menu light green
- menu-blue-light to color the menu light blue
- menu-red-light to color the menu light red
You can enter more than one CSS code. For example, to add a red dot, enter: menu-dot menu-red.
- Done.
Different from other menus, the side menu settings example:
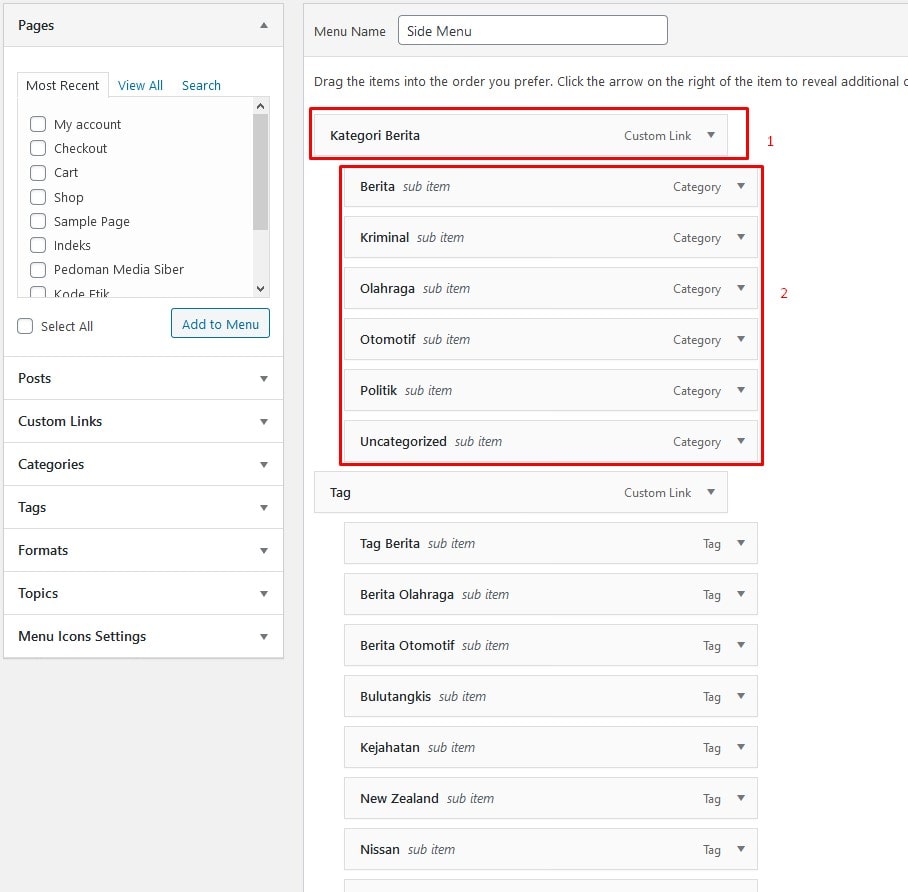
See number 1: it is the menu title that will appear at the top; number 2 is the submenu that will automatically be split into 2 columns under the menu title.
Note: The Wpberita theme supports up to 5 menu locations; see the tutorial video above.
Menu Structure Tips
Solution to add icons to menus: Add Icons to Menu
Use a simple, visitor‑friendly structure:
- The main menu includes key categories or pages (Home, Blog, Contact, etc.).
- Submenus for further grouping (e.g., news categories).
For mobile:
- Keep dropdown levels shallow.
- Use concise, clear labels.
Notes
- Keep the menu structure simple and easy to understand.
- For mobile, use a dedicated menu to maintain usability.
- Use the footer menu for policy links, contact, or other important information.